If you’re looking for a detailed guide on how to sew clips on hair extensions, you’ve come to the right place! In this post, I’ll show you everything you need to know about sewing clips on hair extensions from what kind of hair extensions you should use to how to make it work. And if you’re looking to start selling your own hair extensions online, then keep reading—I’ll explain exactly how to get started.
The Different Types of Clip-In Hair Extensions
First, let’s talk about the different types of clip-in hair extensions that you can find online. We’ll start with clip-ins that you put into your hair by yourself, and we’ll move on to clip-ins that you sew into your hair.
The first type is called clip-ins that you put into your hair by yourself. These clips attach to the scalp and fall out later. The second type is called clip-ins that you sew into your hair. These clips usually stay in for a longer time. There are also clip-ins that you mix with your hair. These are also called fusion clips.
Fusion clips, which are a combination of clip-in and clip-in, are also available online. These clips can be put in by themselves or by using a clip-in gun to insert them into the hair. Fusion clips stay in for about six months. Once they have been worn out, they will either be replaced with new clips or they will be removed from your hair altogether.
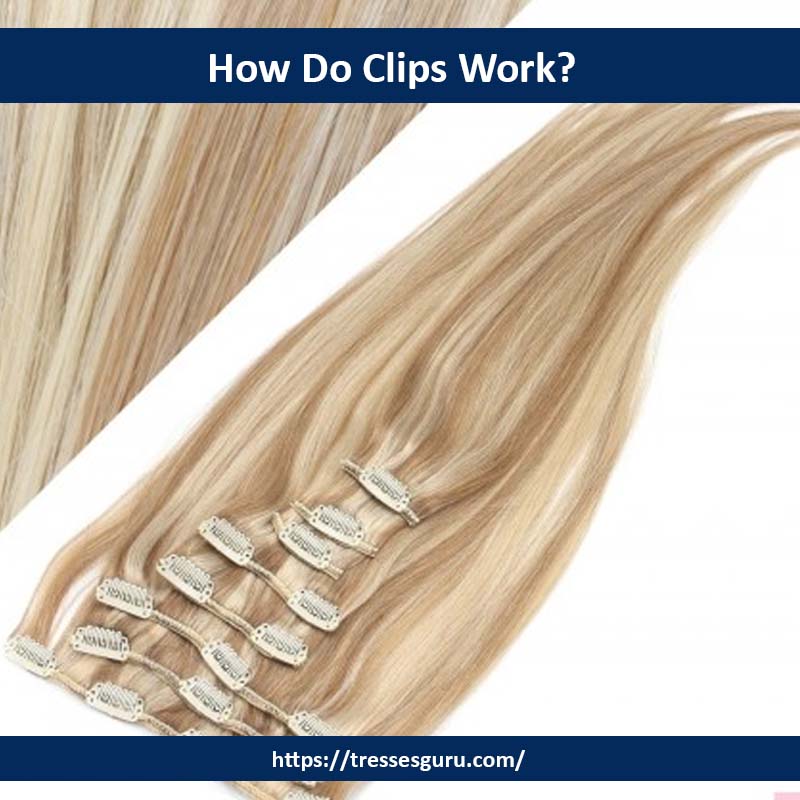
How Do Clips Work?
If you want to have long, healthy, thick hair, you should spend some time at the hairdresser. This will help you to get a haircut that will suit your needs. They will ask you if you have short or long hair, and then they will create the perfect hairstyle for you. This will make your hair look great and feel beautiful. In order to get a great hairstyle, you should visit a professional salon or stylist once a month. When you get a new haircut, you should also keep a mirror next to your bed so that you can see what you look like.
This will help you to recognize the kind of haircuts that are flattering for your face shape. For instance, if you have a round face, you should avoid a severe haircut. Your hairstyle should be clean and sleek. It should frame your face shape and give you a great appearance. This will help you to feel confident and attractive. Your hairstyle should flatter your face shape. If you have a triangular face, you can wear blunt bangs that are pulled back to one side.
If you have a square or rectangular face, you can wear short, curly hair. A long, straight hairstyle will make your face appear longer. If you have a heart-shaped face, you should avoid extreme hairstyles.
What are the Pros and Cons of Sewing Clips on Hair Extensions?
The main benefit of sewing clips on hair extensions is that you can customize your style to match your personality and preferences. When you sew clips on hair extensions, you can have more control over the length and texture of the extensions. This is a good option for women who like to experiment with their hair. They are more creative when it comes to making a different hairstyles. What are the Cons and Pros of Sewing Clips on Hair Extensions?
Pros: Sewing clips on hair extensions is a popular option among women. It is because they can change the look of their hairstyle easily. They can change their look whenever they want. Women who prefer this option do not have to pay high costs to maintain their current style. You may also have more time to spend on your appearance than those women who have to wash their hair daily. This is because you don’t have to brush your hair or comb it. It will take time to learn how to install clips on hair extensions because it requires experience and practice. You will need to know how to trim the extensions so that they stay in place.
Cons: People who sew hair extensions can damage their hair. The heat from the curling iron may cause damage if the extensions are not made properly. Another drawback is that the clips can be easily pulled off.
Easy Steps On How to sew clips on hair extensions
Consider the following steps to sew clips on hair extensions:
1. Threading the Needle
Threading the needle is the first step to installing the clip. You will need to thread the needle. Before you do that, you will need to remove the clips from the extensions.
Make sure you have the right needle for the thread you are using. Make sure you select the correct size for the thread you are using. Using the wrong needle can lead to problems. This is because you can be left with stitches that don’t match up.
Before you start sewing a hair extension, you must make sure that you have the right equipment to do so. You will need to remove the clips before you can start sewing. You will also need to use the correct needles to thread the clip-on hair extensions. There are many different needles available for use. You may need to purchase some of them. This is because different brands of sewing kits are available for use. Before you begin using your sewing kit, you will need to remove the clips from the hair extensions.
If you are sewing on a clip, you will need to remove the metal band from it. You will also need to insert the ends of the thread into the back loop of the metal band, You should use a tapestry needle to do this. You will need to be very careful when you are using the tapestry needle, You can easily poke yourself if you are not careful. This can happen because the needle has sharp ends. Always use a clean needle to avoid getting a cut.
2. Attaching the Clip to the Weft
Before you attach the clip to the hair, you should use a comb to separate the hair strands in the sections. You should make sure that the strands are parallel to each other. Once you have separated the strands, you should insert the clip between them.
Once you have inserted the clip into the hair then you can easily sew clips on the hair extensions, you should tie the two ends of the weft together. You should make sure that the ends of the weft touch the base of the clip. You should also make sure that they are in the same direction. This is to prevent the hair from being pulled out of the extension. When you are done with this step, you should wait until the glue sets.
The clip you are using should be in the middle of the hair. You can do this by putting the hair in a bun. The clip is the right size for the hair in a bun. You can make sure that the hair is in a bun by tying the hair around your finger. Then you can put the clip onto the hair, keeping it in the middle of the hair.
3. Remove the clip from its packaging
There is a hole at the back of the packaging. You should be able to take out the clip. After you remove the clip from the packaging, you should place the end of the extension inside the hole. The end of the extension should be placed in the right direction when you place it into the packaging. Now you should push the clip through the hole.
Make sure that you place the clip in the middle of the extension. If you place it too close to one end, then it will be difficult to place it in the middle of the extension. After you have put the clip on the hair extension, you should hold the clip firmly against the hair. The clip should fit well over the hair. You must read this How to Put Your Hair Up with Extensions to style your extensions.

You can adjust the clip after it is attached. Make sure that the clip is positioned correctly before you put it back into the package. Now you can replace the lid back on the package. The clip is now in a perfect position. You can put it back into the package and save it for later use. Now you should wait until the glue sets. You can do this by placing the hair extension into hot water. Make sure that the water is just below boiling point. The longer you wait, the harder it will be to take the hair extension out. You should be able to do this within 15 minutes.
4. Trim off the excess hair and clean it to make it look cleaner
To begin the process, you will want to trim the hair. You will want to cut it a little bit off of both ends. You can either cut the ends of the hair that you have already attached, or you can use an electric hair trimmer. If you use an electric hair trimmer, make sure that you do not touch the teeth. This will scratch the plastic. This is one of the reasons that you will want to use scissors instead of an electric trimmer.
If you want to sew clips on hair extensions then you have to follow this guide. The next thing that you need to do is to attach the clips. There are two methods that you can use. You can apply the tape directly to the hair. Alternatively, you can attach it to a piece of paper first. This way, you can see how it looks when you are done. You will probably notice that the clips appear to be too long. If you do this, you can trim it off with scissors.
Once you are done, you should wait until the glue sets up. You can do this by placing the hair extension into hot water. Make sure that the water is just below boiling point. The longer you wait, the harder it will be to take the hair extension out. You should be able to do this within 15 minutes. Once the glue has fully dried, you will need to clean the hair extension.
5. Make a small cut on the back side of the extension
Make a small cut with a pair of scissors. Remove any excess material from the hair extension with the scissors. Cut off the loose hair that is attached to the hair extension.
Sewing clips on hair extensions is quite easy. All you need is a sewing machine. First, you should look at the size of the clip. If you are using a smaller clip, you will need to use a sewing machine with a lower thread. You may also need to adjust the stitch setting to a lower thread. If you are using a larger clip, you will need a sewing machine with a higher thread.
You may also need to adjust the stitch setting to a higher thread. You should be able to remove the old clip with your fingers. The first step is to insert the new clip onto the base of the extension. Pull up the new clip until it is in the middle. Put it over the part of the extension that is still on the scalp. Using your hand, press down firmly. Make sure that the clip is securely in place.
Now, you should sew the hair clip in place. You will need to insert the needle from the front side of the clip. Push the needle through the center of the clip. Repeat the process on the other side of the clip. Sew both sides of the clip on the base of the extension.
You should now apply hair spray and wait about 5 minutes. Once the glue has been set up, you can gently remove the hair extension.
6. Apply some glue on both sides of the extension
You should leave the clips in place for 5 minutes. Wait for the glue to set up, then you can gently remove the hair extension.
Sew Clips on Hair extensions Tutorial: For those who do not know, a hair extension is a piece of hair that can be attached to the existing hair. You can then cut it to the length you want and style it in a way that is easy to manage. There are different methods of sewing on hair clips to make them stay on your hair extensions. You can choose one that works for you best.
If you are using hair extensions that come pre-styled, you will need to add the clips and then apply glue to the clip. You can use glue to hold the clips in place. Then, let the extension dry. After you have glued the clip in place, you can put some hairspray over the clip. You can then gently remove the extension once the glue has dried.
The same method can be used when you are using clip-in extensions. You can just sew them into place. After you have sewn the clips in place, you can let the glue dry. You can then use some hairspray to set the clips in place. Then, you can carefully remove the hair extension.
7. Use a small needle to push the two edges of the extension together
This can make it easier for you to remove the hair extension. Once you have removed it, you can brush out the ends of the extension. This makes it possible for you to clean the extensions. You can brush out the glue after you have removed the extension. Then, you can carefully wash the extension.

This is the best way to wash them because you can be sure that no water or soap will get on them. If you want to wash them in the washing machine, you should follow the manufacturer’s instructions. After you have washed the hair extension, you can use the hair spray to set the clips in place. This will make it easy for you to apply the hair extension to your head.
8. Continue this process until all the extensions are glued
It will be much easier to put them in place if they are glued. To make the hair look natural, you should make sure that the hair is cut so that it looks like your own. You can use hairspray to make the hair soft and shiny. Once you’ve prepared the hair properly, you should place the hair extensions on your hair.
You should try to position the hair in the right places to make sure that they look natural. You should use glue to fix the hair extensions to your hair. Use a comb to remove any air bubbles. You can use a comb that has stiff bristles. You will find that they are helpful if you want to push the clips through your hair. If you don’t know how to place them on your hair, you can buy clip-in hair extensions online.
9. Clean up the surface of the extensions
This will help you to avoid getting any glue on your hands. Once you have glued the clips to your hair, you should wait for the glue to dry. You should remove the clips before you go to bed and wash your hands with soap. Try to put the hair extensions back in the same order that you removed them from your hair. If they get tangled, just cut them loose.
Make sure you keep the clips in the right order. You may want to try using hairclips instead of hair extensions. These have a wider base and you can use the tips to push them into your hair. Make sure you have enough glue on your hands before you begin to work with the extensions.
Conclusion
In conclusion, you have Read the complete solutions for How to sew clips on hair extensions,
The first step is to determine which clip you want to use. There are many different types of clips available, so it’s important to select the right type for your hair. For example, some people prefer the traditional hair clip, while others like the tapered clip. The next step is to place the clip on the hair extension.
The easiest way to do this is to place the clip on the hair extension, then pull the hair through the clip. Once the clip is in place, you can start the sewing process. For most hair extensions, the sewing process takes less than five minutes. If you are using a hair extension that has a clip on each side, you will need to sew both sides of the clip at the same time. To sew a hair extension, you will need a sewing machine and thread.
You can use a hair extension kit or a sewing machine that you already own. To make sure you are sewing the correct clip, you will need to follow the instructions included in the clip. If you are not sure about how to sew a