These No-Bake Crunch Bars are the perfect quick and easy homemade treat for when you’re craving something chocolaty, crispy, and delicious—without turning on the oven! With just a few simple ingredients, these bars come together in minutes, making them great for meal prep, snacks, or dessert.
If you love crunchy, chocolatey treats, this recipe is a must-try!
Why You’ll Love This Recipe
✔ No Oven Needed – Perfect for summer or anytime you don’t want to bake.
✔ Only 5 Ingredients – Simple pantry staples, no fancy ingredients required.
✔ Crispy & Chocolatey – The ultimate combination of crunch and sweetness.
✔ Quick & Easy – Takes just 10 minutes to prepare.
✔ Kid-Friendly & Customizable – Perfect for lunchboxes, snacks, or a party treat!
Ingredients for No-Bake Crunch Bars
🍫 For the Chocolate Crunch Layer:
-
2 cups semi-sweet chocolate chips (or dark chocolate)
-
1 cup peanut butter (creamy or chunky)
-
2 tablespoons unsalted butter (or coconut oil)
-
2 tablespoons honey or maple syrup (for sweetness)
-
2 ½ cups crispy rice cereal (Rice Krispies or any puffed rice cereal)
🌿 Optional Add-Ins & Variations:
-
½ teaspoon vanilla extract (for extra flavor)
-
¼ teaspoon sea salt (enhances sweetness)
-
½ cup chopped nuts (almonds, walnuts, or pecans for crunch)
-
½ cup mini marshmallows (for a s’mores-like twist)
-
½ cup dried fruit (cranberries, raisins, or coconut flakes)
Step-by-Step Instructions
Step 1: Melt the Chocolate Mixture
-
In a heatproof bowl, combine chocolate chips, peanut butter, butter, and honey.
-
Microwave in 30-second intervals, stirring each time, until completely melted and smooth.
-
Alternatively, melt using a double boiler by placing the bowl over a pot of simmering water.
Pro Tip: Stir in vanilla extract and sea salt for extra depth of flavor.
Step 2: Add the Crunch
-
Pour the crispy rice cereal into the melted chocolate mixture.
-
Gently fold until all cereal is coated in chocolate.
-
If adding nuts, marshmallows, or dried fruit, mix them in at this stage.
Pro Tip: Be gentle when mixing to avoid crushing the cereal.
Step 3: Transfer to a Baking Dish
-
Line an 8×8-inch or 9×9-inch pan with parchment paper.
-
Pour the mixture into the pan and spread evenly.
-
Press down gently with a spatula to make the bars compact and even.
Pro Tip: For perfectly shaped bars, press down with another piece of parchment paper.
Step 4: Chill & Set
-
Place the pan in the refrigerator for at least 1 hour, or until firm.
-
For quicker setting, place in the freezer for 20-30 minutes.
Pro Tip: The colder the bars, the easier they are to slice neatly!
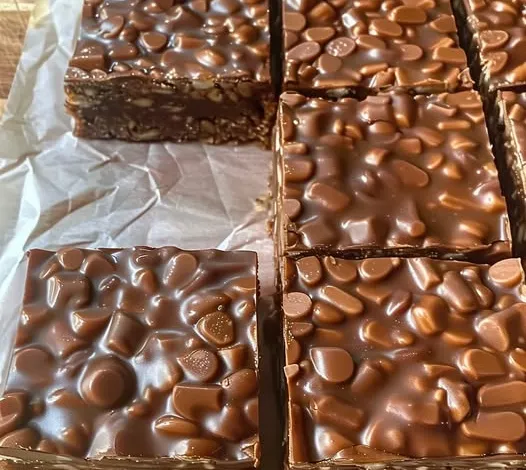
Step 5: Slice & Serve
-
Remove from the fridge and lift out the parchment paper.
-
Using a sharp knife, slice into 12-16 bars.
-
Enjoy immediately, or store for later!
Pro Tip: Run the knife under hot water before slicing for clean, smooth cuts.
Serving Suggestions
🍓 With Fresh Fruit – Serve alongside strawberries, bananas, or raspberries.
☕ With Coffee or Tea – Perfect with an afternoon cup of coffee or herbal tea.
🍨 As an Ice Cream Topping – Crumble bars over vanilla ice cream for a delicious sundae.
🥜 With Peanut Butter Drizzle – Drizzle extra peanut butter on top for extra indulgence.
Storage & Shelf Life
📦 Room Temperature: Store in an airtight container for up to 5 days.
❄️ Refrigeration: Keeps well for up to 2 weeks in the fridge.
🧊 Freezing: Freeze in a zip-top bag for up to 3 months.
Pro Tip: If frozen, let bars sit at room temperature for 5-10 minutes before eating.
Custom Variations & Ingredient Swaps
🍯 Nut-Free Version – Use sunflower seed butter or tahini instead of peanut butter.
🍫 Double Chocolate Bars – Mix in white chocolate chips for extra sweetness.
🥥 Coconut Lover’s Bars – Add shredded coconut for tropical flavor.
🥜 Salted Peanut Butter Crunch Bars – Use salted peanuts and sprinkle with flaky sea salt.
🌱 Vegan Version – Use vegan chocolate and maple syrup instead of honey.
Pro Tips for the Best No-Bake Crunch Bars
✔ Use High-Quality Chocolate – Dark or semi-sweet chocolate creates the best flavor.
✔ Melt Chocolate Slowly – Prevents burning or graininess.
✔ Press Firmly into the Pan – Ensures bars hold their shape.
✔ Chill Long Enough – Helps them firm up and become sliceable.
✔ Use Fresh Cereal – Stale cereal won’t give that perfect crunch.
Frequently Asked Questions (FAQs)
1. Can I use white chocolate instead of dark chocolate?
Yes! White chocolate will make the bars sweeter and creamier.
2. How do I prevent my bars from falling apart?
Make sure to press them firmly in the pan and chill properly before slicing.
3. Can I make these gluten-free?
Yes! Just use gluten-free rice cereal.
4. Can I use almond butter instead of peanut butter?
Absolutely! Any nut butter works, including cashew butter or sunflower butter.
5. How can I make these lower in sugar?
Use sugar-free chocolate chips and skip the honey.
Final Thoughts
These No-Bake Crunch Bars are the ultimate easy dessert—they’re crispy, chocolatey, and totally addictive! Whether you’re making them for meal prep, a party, or a quick treat, they’ll disappear fast.
✔ Only 5 ingredients
✔ No baking required
✔ Super customizable
✔ Kid-friendly & perfect for sharing
🔥 Try them today and let me know your favorite variation! 🔥