
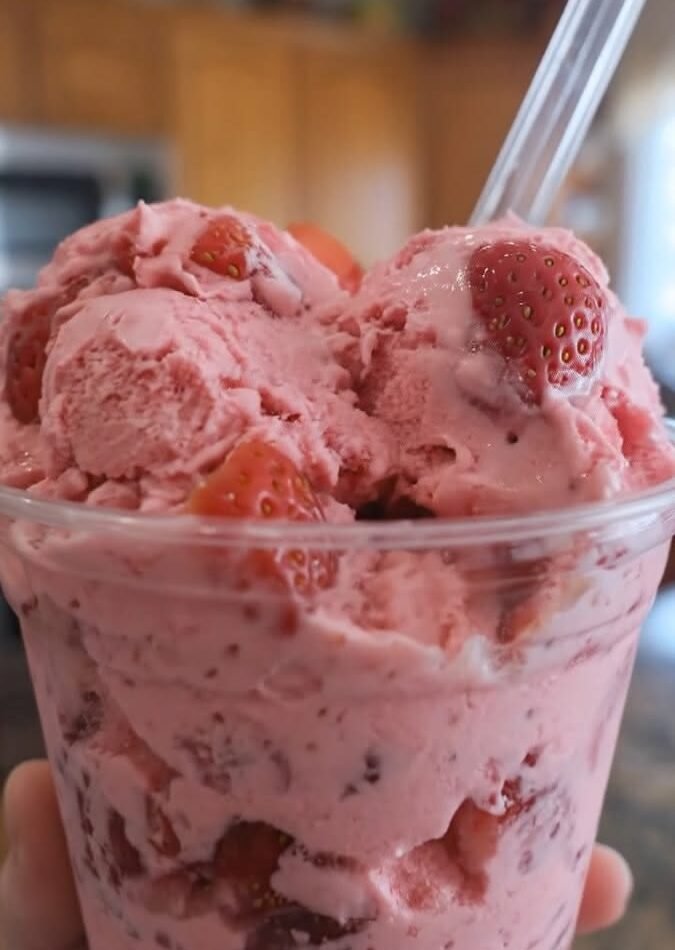
WW-Friendly Strawberry Cheesecake Ice Cream
Craving something creamy, fruity, and delicious without making a super-heavy dessert? This WW-Friendly Strawberry Cheesecake Ice Cream is a wonderful treat when you want the classic flavor of strawberry cheesecake in a cool, frozen dessert.
Made with juicy strawberries, creamy Greek yogurt, light cream cheese, vanilla, and a touch of sweetener, this homemade ice cream has a delicious cheesecake-like tang while keeping the recipe lighter than traditional ice cream. Fresh strawberries add natural sweetness, beautiful color, and plenty of fruity flavor.
The best part? You don’t need an ice cream maker. With a little patience and a few simple ingredients, you can make this refreshing dessert right in your kitchen.
🛒 Ingredients
For the Strawberry Mixture
2 cups fresh strawberries, hulled and chopped
1 tablespoon lemon juice
1–2 tablespoons water
1–2 tablespoons zero-calorie sweetener, or sweetener of your choice
For the Cheesecake Ice Cream
1½ cups nonfat or low-fat Greek yogurt
6 ounces light cream cheese, softened
1 teaspoon pure vanilla extract
2–3 tablespoons zero-calorie powdered sweetener, adjusted to taste
Pinch of salt
3–4 low-fat graham crackers or digestive biscuits, crushed, optional
👩🍳 Instructions
1. Prepare the Strawberries
Wash and hull the strawberries. Chop them into small pieces and place them in a small saucepan.
Add the lemon juice, water, and sweetener. Cook over medium-low heat for about 5–8 minutes, stirring occasionally. The strawberries should become soft and release their juices.
For a smoother strawberry flavor, lightly mash the berries with a fork or potato masher. You don’t need to make them completely smooth because small strawberry pieces add a lovely texture to the finished ice cream.
Remove from the heat and allow the strawberry mixture to cool completely.
2. Make the Cheesecake Base
Place the softened light cream cheese in a large mixing bowl. Beat until smooth and creamy.
Add the Greek yogurt, vanilla extract, sweetener, and a small pinch of salt. Mix until everything is completely combined and the mixture looks smooth.
Taste the mixture before freezing. If you prefer a sweeter dessert, add a little more sweetener.
Greek yogurt gives the dessert a pleasant tang while helping create the creamy cheesecake flavor without relying on heavy cream.
3. Add the Strawberries
Once the strawberry mixture has cooled, gently fold it into the cheesecake base.
For a beautiful strawberry swirl, don’t completely mix everything together. Leave some strawberry streaks throughout the mixture.
If you prefer a completely strawberry-flavored ice cream, blend the strawberry mixture until smooth before combining it with the cheesecake base.
4. Add the Cheesecake Crumb
Crush the low-fat graham crackers or digestive biscuits into small crumbs.
Fold about half of the crumbs into the ice cream mixture. Reserve the remaining crumbs for serving.
The biscuit crumbs give the dessert that classic cheesecake-crust flavor.
5. Freeze
Transfer the mixture to a freezer-safe container. Smooth the top with a spatula and cover tightly.
Place it in the freezer for about 5–6 hours, or until firm.
For a smoother homemade ice cream, remove the container every 1½–2 hours during the first few hours and stir the mixture vigorously before returning it to the freezer. This helps break up ice crystals and gives the dessert a creamier texture.
If using an ice cream maker, pour the prepared mixture into the machine and churn according to the manufacturer’s instructions. A traditional WW strawberry cheesecake ice cream method also uses an ice cream maker or periodic mixing when making it without one.
6. Serve
Let the frozen ice cream sit at room temperature for 5–10 minutes before scooping.
Serve in small bowls or cones and top with:
Fresh sliced strawberries
A sprinkle of crushed graham crackers
A few fresh mint leaves
A small strawberry drizzle
For an extra-pretty presentation, add one whole strawberry on top.
💡 Recipe Tips
Use ripe strawberries: The sweeter and more flavorful the strawberries, the better your ice cream will taste.
Don’t skip the lemon juice: A little lemon helps brighten the strawberry flavor and balances the creamy cheesecake base.
Soften the cream cheese: Room-temperature cream cheese blends much more smoothly with Greek yogurt.
Adjust the sweetness: Strawberries vary in sweetness, so taste your mixture before freezing and adjust the sweetener accordingly.
For a stronger cheesecake flavor: Add a little extra vanilla and a tiny pinch of salt.
For a smoother texture: Let the ice cream soften slightly before serving rather than trying to scoop it immediately from the freezer.
🍓 Why You’ll Love This Recipe
This strawberry cheesecake ice cream combines three irresistible flavors: sweet strawberries, creamy cheesecake, and buttery biscuit crumbs. It is refreshing enough for summer but delicious enough to make whenever a sweet craving strikes.
Unlike traditional ice cream recipes that often rely on heavy cream and large amounts of sugar, this lighter version uses Greek yogurt and light cream cheese to create a creamy, tangy base.
It’s an easy dessert to prepare ahead of time, making it perfect for family gatherings, summer parties, or a simple after-dinner treat.
❄️ Storage
Keep the ice cream in an airtight freezer-safe container for up to 2 weeks for the best texture and flavor. Place a piece of parchment paper or plastic wrap directly against the surface before sealing the container to help reduce ice crystals.
🍦 Final Result
Every spoonful delivers creamy cheesecake flavor, juicy strawberry pieces, and a delicious graham-cracker crunch. It’s a simple homemade frozen dessert that feels indulgent while fitting nicely into a lighter dessert menu.
Servings: 6
Prep Time: 20 minutes
Cook Time: 8 minutes
Freezing Time: 5–6 hours
Total Time: About 6 hours 30 minutes
WW Points can vary depending on the specific brands and sweeteners used, so calculate the points using the exact ingredients in your WW app.