A Guilt-Free, Creamy, and Fruity Dessert That Tastes Too Good to Be Sugar-Free!
When it comes to diabetes-friendly desserts, it can be difficult to find something that truly satisfies. But this no-bake strawberry cheesecake is a game changer. It’s cool, creamy, fruity, and absolutely delicious — and best of all, it’s 100% sugar-free, low-carb, and easy to make. You don’t even need to turn on the oven.
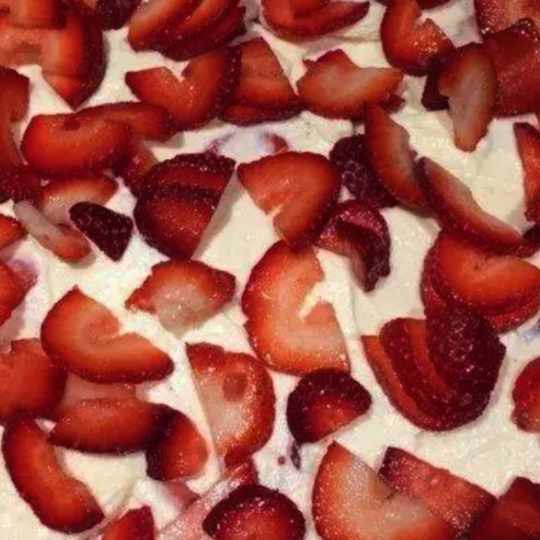
With a buttery almond crust, a rich cream cheese filling, and a naturally sweetened strawberry topping, this cheesecake is perfect for summer picnics, potlucks, or simply keeping in the fridge for a no-guilt treat any time of day.
🧾 Why You’ll Love This Recipe
-
✅ No baking required – perfect for hot weather
-
✅ Sugar-free and diabetic-friendly
-
✅ Rich, creamy, and full of strawberry flavor
-
✅ Made with simple, wholesome ingredients
-
✅ Great for keto or low-carb diets too
-
✅ Can be made ahead and refrigerated
🍽 Ingredients (Serves 10–12)
🥧 For the Crust:
-
1 ½ cups almond flour
-
¼ cup melted butter (unsalted)
-
1 tablespoon granulated sugar-free sweetener (erythritol, monk fruit, or allulose)
-
½ teaspoon vanilla extract (optional)
💡 Almond flour keeps it gluten-free and low-carb. You can use crushed low-carb graham crackers instead if preferred.
🧀 For the Cheesecake Filling:
-
16 oz (2 blocks) cream cheese, softened
-
½ cup powdered sugar-free sweetener (Swerve, allulose, or monk fruit)
-
1 teaspoon vanilla extract
-
1 cup heavy whipping cream, cold
-
Optional: 1 tablespoon lemon juice (brightens the flavor)
🍓 For the Strawberry Topping:
-
2 cups fresh or frozen strawberries, chopped
-
2 tablespoons water
-
2 tablespoons granulated sugar-free sweetener
-
½ teaspoon lemon juice
-
½ teaspoon unflavored gelatin powder or 1 tsp chia seeds (for thickening)
🍓 Using frozen strawberries? Thaw them first and drain excess liquid.
🧂 Optional Garnishes:
-
Whole fresh strawberries
-
Mint leaves
-
Whipped cream (sugar-free)
-
Shaved dark chocolate (85% or higher)
🍳 Equipment Needed
-
8- or 9-inch springform pan or pie plate
-
Hand mixer or stand mixer
-
Mixing bowls
-
Saucepan (for strawberry topping)
-
Spatula
-
Measuring cups and spoons
⏲ Time Overview
-
Prep Time: 20 minutes
-
Chill Time: 4–6 hours minimum (or overnight)
-
Total Time: ~5 hours (mostly chilling)
👨🍳 Step-by-Step Instructions
🥣 Step 1: Make the Almond Crust
-
In a bowl, mix together the almond flour, sweetener, and melted butter until a moist, crumbly dough forms.
-
Press the mixture firmly into the bottom of a greased springform pan or pie dish using a spatula or the bottom of a glass.
-
Chill the crust in the fridge or freezer while you prepare the filling. No baking needed!
🧊 Chilling helps the crust firm up and hold its shape under the filling.
🧁 Step 2: Prepare the Sugar-Free Cheesecake Filling
-
In a large bowl, beat the softened cream cheese with a hand mixer until smooth and fluffy (2–3 minutes).
-
Add the powdered sweetener and vanilla extract (and lemon juice, if using), then beat again until combined and creamy.
-
In a separate bowl, whip the cold heavy cream until stiff peaks form (do not overwhip).
-
Gently fold the whipped cream into the cream cheese mixture using a spatula. Mix until smooth and no streaks remain.
🍰 This step gives the cheesecake its airy, mousse-like texture.
🍽 Step 3: Assemble the Cheesecake
-
Pour the cheesecake filling over the chilled crust.
-
Use a spatula to smooth out the top.
-
Cover the pan with plastic wrap and refrigerate for at least 4 hours, preferably overnight.
✅ The longer it chills, the better the texture will be when slicing.
🍓 Step 4: Make the Sugar-Free Strawberry Topping
-
In a saucepan over medium heat, combine chopped strawberries, water, sweetener, and lemon juice.
-
Simmer for 6–8 minutes, stirring occasionally, until strawberries break down.
-
Mash the berries lightly with a spoon for a chunky sauce, or blend for smooth.
-
Add gelatin powder and stir well to dissolve. Simmer for 1–2 more minutes.
-
Alternatively, stir in chia seeds and let sit for 10–15 minutes to thicken naturally.
-
-
Let the topping cool to room temperature, then refrigerate until slightly thickened.
🍓 Step 5: Add the Topping and Chill
-
Once the cheesecake has chilled and set, gently spread the cooled strawberry topping over the top.
-
Return to the refrigerator for another 30 minutes to allow topping to firm up slightly.
-
When ready to serve, release the cheesecake from the springform pan and transfer to a serving platter.
🥄 Serving Tips
-
Serve chilled, sliced with a warm knife (dip in hot water, then wipe).
-
Garnish with whipped cream, fresh berries, or mint for a polished look.
-
Add a drizzle of melted sugar-free chocolate for an extra decadent finish.
🧊 Storage & Make-Ahead Tips
Refrigeration:
-
Store the cheesecake covered in the refrigerator for up to 5 days.
Freezing:
-
Wrap tightly in plastic and foil, then freeze for up to 2 months.
-
Thaw overnight in the fridge before serving.
Make-Ahead:
-
This cheesecake is ideal for making 1–2 days in advance — it gets better as it sits!
🔁 Variations to Try
🍋 Lemon Berry Cheesecake:
-
Add lemon zest to the filling and top with a mix of strawberries and blueberries.
🥥 Coconut Crust:
-
Use unsweetened shredded coconut + almond flour for a tropical twist.
🫐 Blueberry Swirl:
-
Swirl in a sugar-free blueberry compote instead of strawberry.
🍫 Chocolate-Covered Strawberry:
-
Add a thin layer of melted dark sugar-free chocolate between crust and filling.
📊 Nutritional Information (Per Slice – Approximate)
-
Calories: 210
-
Fat: 18g
-
Protein: 5g
-
Net Carbs: ~4g
-
Fiber: 2g
-
Sugar: <1g (from strawberries)
🩺 Always check with a healthcare provider before changing your meal plan.
✅ Expert Tips for Success
-
Use full-fat cream cheese for best texture and richness.
-
Let cream cheese soften at room temp before mixing to avoid lumps.
-
Chill thoroughly to ensure clean slices and perfect texture.
-
Use gelatin or chia to help the topping firm up naturally without sugar.
-
Always taste the filling and topping — adjust sweetener to your preference.
❤️ Final Thoughts
This Diabetic No-Bake Sugar-Free Strawberry Cheesecake is the dessert that proves you can have your cake — and eat it too — while keeping blood sugar in check. It’s cool, creamy, fruity, and every bit as indulgent as traditional cheesecake, without any of the sugar.
Whether you’re managing diabetes, eating low-carb, or just trying to make better dessert choices, this no-bake wonder will satisfy your cravings and impress your guests. Easy to make, beautiful to serve, and even better to eat — it’s a dessert you’ll come back to again and again.


