Slow-Roasted Garlic Herb Beef Roast
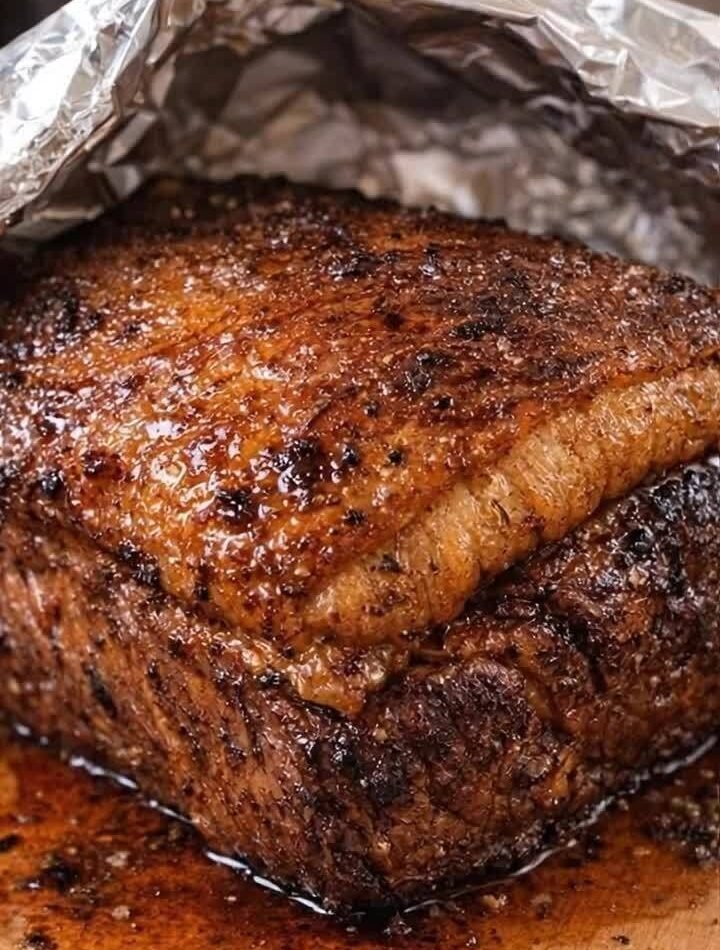
This Slow-Roasted Garlic Herb Beef Roast is a beautiful centerpiece for a cozy Sunday dinner or special family meal. The beef is rubbed with a fragrant mixture of garlic, rosemary, thyme, olive oil, and cracked black pepper, then roasted gently until tender and juicy. As it cooks, the herbs form a savory crust while the garlic infuses the meat with incredible flavor.
Served with roasted potatoes, carrots, green beans, or creamy mashed potatoes and a spoonful of rich pan gravy, this roast turns simple ingredients into an unforgettable comfort-food dinner.
🛒 Ingredients
For the Beef Roast
3–4 lb beef chuck roast, sirloin roast, or top round roast
2 tbsp olive oil
5 cloves garlic, finely minced
1 tbsp fresh rosemary, chopped
1 tbsp fresh thyme leaves
1 tsp dried oregano
2 tsp kosher salt
1 tsp freshly cracked black pepper
1 tsp onion powder
1 tsp paprika
1 tbsp Worcestershire sauce
For the Roasting Pan
1 large onion, sliced
3 carrots, cut into chunks
3 celery stalks, cut into pieces
1½ cups beef broth
½ cup red wine or additional beef broth
2 bay leaves
3 sprigs fresh thyme
2 tbsp butter
Optional Gravy
2 tbsp butter
2 tbsp all-purpose flour
1½ cups strained pan juices
👩🍳 Instructions
1. Bring the Roast to Room Temperature
Remove the beef from the refrigerator about 30–45 minutes before cooking.
Pat the roast completely dry with paper towels. Drying the surface helps the seasoning adhere and encourages better browning.
2. Make the Garlic Herb Rub
In a small bowl, combine the olive oil, minced garlic, rosemary, thyme, oregano, salt, black pepper, onion powder, paprika, and Worcestershire sauce.
Mix into a thick, fragrant paste.
Rub the mixture generously over every surface of the beef. Make sure the sides are well coated too.
For even deeper flavor, cover the seasoned roast and refrigerate it overnight. Bring it out before cooking so it isn’t refrigerator-cold when it goes into the oven.
3. Sear the Beef
Preheat your oven to 300°F (150°C).
Heat a large oven-safe Dutch oven or heavy roasting pan over medium-high heat.
Add a small drizzle of olive oil if needed.
Place the seasoned roast into the hot pan and sear for approximately 3–4 minutes per side, turning until a rich brown crust develops.
Don’t worry if some of the garlic and herbs darken slightly. The browned bits left in the pan will add wonderful flavor to the cooking juices.
Remove the roast and set it aside temporarily.
4. Prepare the Vegetables
Add the sliced onion, carrots, and celery to the same pan.
Cook for approximately 4–5 minutes, stirring occasionally, until the vegetables begin to soften.
Add the butter and allow it to melt into the vegetables.
5. Add the Cooking Liquid
Pour in the red wine and use a wooden spoon to scrape the browned bits from the bottom of the pan.
Let the wine simmer for 2–3 minutes.
Add the beef broth, bay leaves, and fresh thyme.
Return the beef roast to the pan.
The liquid should come partway up the sides of the roast but shouldn’t completely cover it.
6. Slow Roast
Cover the Dutch oven tightly with its lid.
Place it in the oven and roast for approximately 3½–4½ hours, depending on the size and cut of beef.
Check the roast periodically toward the end of cooking.
If you’re using chuck roast, it should become extremely tender and easily pull apart with a fork.
If you’re using a leaner cut such as top round, avoid cooking it until it shreds. Instead, use an instant-read thermometer and cook to your preferred level of doneness.
7. Brown the Exterior
Once the beef is tender, remove the lid.
Increase the oven temperature to 400°F (200°C).
Roast uncovered for another 10–15 minutes to deepen the color of the garlic-herb crust.
Keep a close eye on the garlic because it can brown quickly.
8. Rest the Roast
Transfer the beef to a cutting board.
Loosely cover it with aluminum foil and let it rest for 20–30 minutes.
Resting is essential because it allows the juices to redistribute throughout the roast instead of spilling onto the cutting board when sliced.
9. Make the Gravy
Strain the cooking liquid, removing the vegetables, herbs, and bay leaves.
Melt butter in a saucepan over medium heat.
Whisk in the flour and cook for about 1 minute.
Slowly whisk in approximately 1½ cups of the strained pan juices.
Continue cooking for 3–5 minutes, whisking frequently, until the gravy becomes smooth and thick.
Taste and adjust the seasoning.
For a lighter gravy, simply simmer the pan juices until slightly reduced and spoon them directly over the sliced beef.
🔪 How to Slice the Roast
Once the roast has rested, identify the direction of the muscle fibers.
Using a sharp carving knife, slice against the grain into thin, even pieces.
Cutting against the grain shortens the muscle fibers and makes the beef noticeably easier to chew.
For chuck roast, thicker slices or fork-tender shredded pieces work beautifully.
🥔 Best Side Dishes
This roast pairs wonderfully with classic comfort-food sides:
Creamy mashed potatoes
Garlic roasted potatoes
Honey-glazed carrots
Green beans
Roasted Brussels sprouts
Creamed spinach
Buttered egg noodles
Yorkshire pudding
Crusty dinner rolls
For a traditional Sunday dinner, serve thick slices of beef over mashed potatoes with roasted carrots and plenty of garlic herb gravy.
💡 Pro Tips
Dry the beef first. A dry surface browns much better.
Don’t skip the sear. Browning gives the roast a deeper, more complex flavor.
Use fresh herbs when possible. Rosemary and thyme release incredible aroma during slow roasting.
Don’t rush the roast. Low-temperature cooking allows tougher cuts to become tender.
Keep the pan covered. This helps prevent the beef from drying out during the long cooking time.
Rest before slicing. Give the roast at least 20 minutes to rest.
Slice against the grain. This is especially important for leaner cuts.
🥩 Choosing the Right Cut
Chuck roast: Best for exceptionally tender, fall-apart beef. It contains enough connective tissue and fat to handle long cooking.
Top round: Leaner and better suited to slicing rather than shredding.
Sirloin roast: Tender and flavorful, with a slightly firmer texture.
Rump roast: A good option for slow roasting when you want substantial slices.
For the most forgiving, ultra-tender result, chuck roast is my favorite choice.
❄️ Storage & Reheating
Store leftover beef in an airtight container with some of the pan juices or gravy. Refrigerate for up to 4 days.
For longer storage, freeze the beef with a little gravy to help preserve moisture.
Reheat gently in a covered dish at 300°F (150°C) until warmed through. Avoid overheating because it can dry out the meat.
Leftover roast is delicious in sandwiches, wraps, beef bowls, tacos, or served over mashed potatoes the next day.
❤️ Why You’ll Love This Roast
This Slow-Roasted Garlic Herb Beef Roast is the kind of meal that makes the whole house smell incredible. The combination of garlic, rosemary, thyme, Worcestershire sauce, and deeply browned beef creates layers of savory flavor, while the slow roasting method delivers tender, satisfying meat.
It’s simple enough for a weekend family dinner but impressive enough to serve when guests arrive. Pair it with creamy potatoes and homemade gravy, and you’ve got a classic meal everyone will look forward to.
🧾 Recipe Details
Prep Time: 25 minutes
Cook Time: 3½–4½ hours
Resting Time: 20–30 minutes
Total Time: About 4½–5½ hours
Servings: 6–8
Oven Temperature: 300°F (150°C)