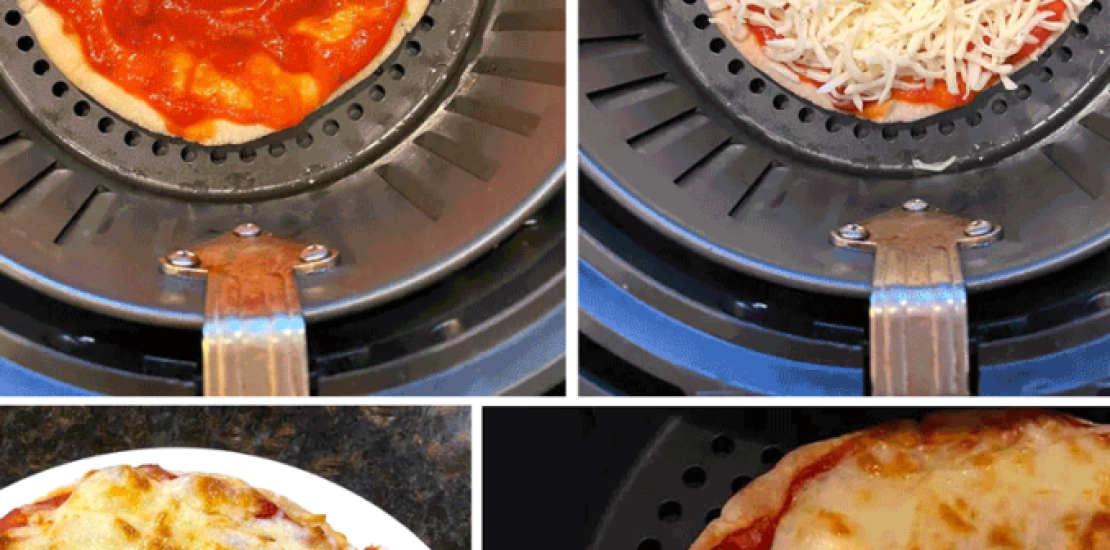
Welcome to our culinary adventure as we explore the delightful world of Air Fryer Pita Pizza!
If you’re a pizza lover looking for a quick and mouthwatering treat, you’ve come to the right place.
In this article, we will guide you through the step-by-step process of crafting the perfect Air Fryer Pita Pizza that will leave your taste buds dancing with joy.
Say goodbye to delivery and frozen pizzas, as we unveil the secrets to creating a gourmet experience right in your kitchen.
Why Choose Air Fryer Pita Pizza?
Air Fryer Pita Pizza is a game-changer for several reasons.
Firstly, it offers a healthier alternative to traditional pizza by using less oil, making it a guilt-free pleasure.
Secondly, it saves valuable time, making it an ideal option for busy individuals who crave a quick and delicious meal. Lastly, the versatility of this recipe allows you to customize your pizza with an array of toppings, catering to everyone’s unique preferences.
Ingredients You’ll Need
To embark on this culinary journey, gather the following ingredients:
- Whole wheat pita bread (for a healthier option) or regular pita bread
- Fresh and flavorful pizza sauce
- Shredded mozzarella cheese
- Assorted toppings of your choice (e.g., bell peppers, onions, tomatoes, olives, mushrooms, etc.)
- Italian seasoning mix for that authentic pizza taste
Instructions
Step 1: Preparing the Air Fryer
Start by preheating your air fryer to 400°F (200°C) for a few minutes. This ensures your pizza cooks evenly and achieves that perfect crispness.
Step 2: Assembling the Pita Pizza
Take one piece of pita bread and spread a generous amount of pizza sauce evenly across its surface. The key to a great pizza is in the sauce; use one with vibrant flavors for the best result.
Step 3: Layering the Cheese and Toppings
Sprinkle a generous amount of shredded mozzarella cheese on top of the sauce. Cheese lovers can even blend different types of cheese for a more decadent experience. Now, it’s time to unleash your creativity! Layer on your favorite toppings, whether it’s the classic pepperoni or a vegetarian medley of colorful veggies.
Step 4: The Final Touch
For that extra burst of flavor, lightly sprinkle some Italian seasoning mix over your creation. This will elevate the taste and give your pizza that authentic Italian touch.
Step 5: Air Frying
Carefully place the assembled pita pizza into the preheated air fryer basket. Cook for approximately 6-8 minutes or until the cheese melts, and the edges of the pita turn golden brown.
Step 6: Serving and Enjoying
Once your Air Fryer Pita Pizza is ready, remove it from the air fryer and let it cool for a moment. Slice it into wedges and savor each delicious bite. Pair it with a fresh green salad or your favorite beverage for a complete meal.
A Nutritional Perspective
Not only is Air Fryer Pita Pizza a scrumptious delight, but it also offers some nutritional benefits. By using whole wheat pita bread and loading up on veggies, you can create a well-balanced meal rich in fiber, vitamins, and minerals. Additionally, the controlled use of cheese and sauce helps in managing calorie intake.
Conclusion
In conclusion, Air Fryer Pita Pizza is a fantastic alternative to traditional pizza, offering a healthier, quicker, and customizable option for pizza enthusiasts. With its simple preparation and delectable taste, it’s a win-win for busy individuals and families alike. So, the next time you’re craving pizza, grab your air fryer and pita bread, and let your imagination run wild. Enjoy the pleasure of creating your very own gourmet Air Fryer Pita Pizza, and take pride in your culinary masterpiece!
Remember, the world of Air Fryer Pita Pizza is boundless, with endless opportunities for experimenting with flavors and toppings. Happy air frying!


