In the realm of homemade bread, the air fryer emerges as an unexpected yet remarkably efficient tool, offering a shortcut to golden-brown crusts and soft, airy interiors. Gone are the days of lengthy proofs and extensive oven preheating; with this innovative method, achieving bakery-quality results becomes a breeze. Let’s delve into the art of crafting professional-grade bread within the confines of your kitchen, utilizing the precision and speed of the air fryer.
Preparing the Dough: The journey begins with a harmonious blend of flour, water, yeast, and a hint of sweetness, forming the foundation of your artisanal loaf. Through a careful activation process, the yeast awakens, infusing the dough with life and flavor. A symphony of kneading follows, as hands meet dough to cultivate its elasticity and texture, yielding a canvas primed for transformation.
Rising to Greatness: Patience becomes your ally as the dough embarks on its ascension, nestled within a cocoon of warmth. Within the confines of a cozy corner, it doubles in size, a testament to the alchemy of fermentation. This crucial phase allows the flavors to deepen and the structure to develop, laying the groundwork for a stellar baking performance.
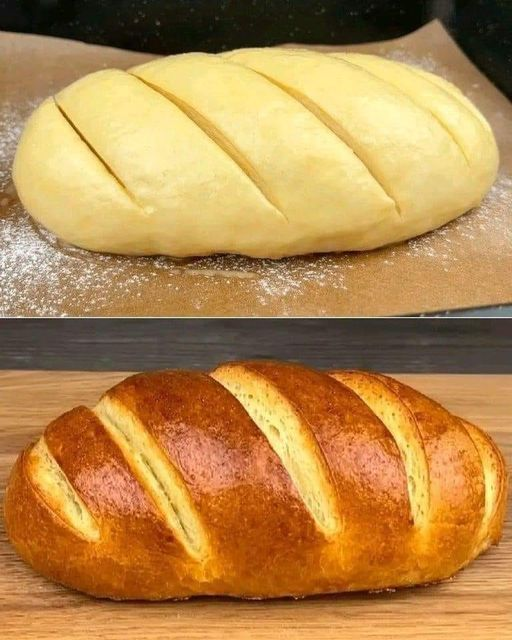
Shaping and Preheating: With practiced hands, the dough is coaxed into its final form, be it a rustic boule or delicate rolls, each bearing the promise of culinary delight. As anticipation builds, the air fryer hums to life, its chamber preheating to the optimal temperature, ready to embrace the doughy creations that await their moment of transformation.
The Art of Baking: Into the belly of the air fryer, the dough ventures, greeted by a rush of hot air and the promise of caramelization. As minutes pass, a tantalizing aroma fills the kitchen, signaling the gradual metamorphosis from raw ingredients to golden perfection. The crust crisps to a satisfying crunch, while the interior retains its tender embrace, resulting in a harmonious marriage of texture and taste.
Cooling and Indulgence: Emerging from the confines of the air fryer, the bread basks in its newfound glory, its surface adorned with a lustrous sheen. A brief respite allows for cooling, though anticipation mounts with each passing second. Finally, the moment of indulgence arrives, as knife meets crust, yielding to reveal the pillowy softness within. Whether adorned with a pat of butter or savored in its purest form, each bite serves as a testament to the culinary prowess achieved through the marriage of tradition and innovation.
Conclusion: In the realm of culinary experimentation, the air fryer stands as a beacon of possibility, inviting enthusiasts to push the boundaries of what is deemed possible within the confines of their kitchen. Through the mastery of technique and a dash of creativity, homemade bread emerges not as a mere staple but as a culinary masterpiece, worthy of acclaim and admiration. So, embark on this gastronomic adventure, armed with flour-dusted hands and a spirit of culinary exploration, and let the air fryer guide you on a journey to bread-making excellence.
Homemade Bread in the Air Fryer
Ingredients:
- 2 cups all-purpose flour
- 1 tablespoon sugar
- 1 teaspoon salt
- 1 tablespoon active dry yeast
- 3/4 cup warm water
- 2 tablespoons olive oil
- Optional: herbs, garlic powder, or other seasonings for flavor
Instructions:
- Activate the yeast: In a small bowl, combine the warm water and sugar. Sprinkle the yeast over the water and let it sit for about 5-10 minutes, until it becomes frothy.
- Prepare the dough: In a large mixing bowl, combine the flour and salt. Add the activated yeast mixture and olive oil to the flour mixture. Mix until a dough forms.
- Knead the dough: Transfer the dough to a lightly floured surface and knead it for about 5-7 minutes, until it becomes smooth and elastic.
- Let the dough rise: Place the dough in a lightly oiled bowl, cover it with a clean kitchen towel or plastic wrap, and let it rise in a warm place for about 1 hour, or until it doubles in size.
- Shape the bread: After the dough has risen, punch it down to release the air bubbles. Shape it into a loaf or rolls, depending on your preference.
- Preheat the air fryer: Preheat your air fryer to 350°F (175°C) for about 5 minutes.
- Bake the bread: Once the air fryer is preheated, place the shaped dough in the air fryer basket. You may need to do this in batches depending on the size of your air fryer. Bake for 15-20 minutes, or until the bread is golden brown and sounds hollow when tapped on the bottom.
- Cool and serve: Remove the bread from the air fryer and let it cool on a wire rack for a few minutes before slicing. Serve warm with butter or your favorite toppings.