A Little Story Before We Begin
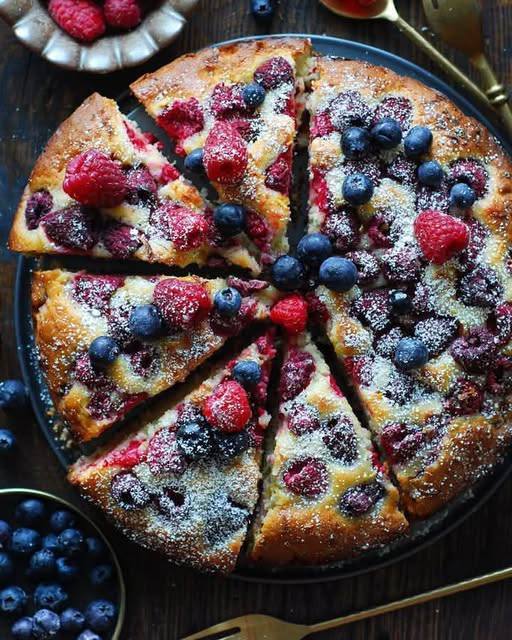
There’s something special about cakes that marry citrus with berries. Lemon brings brightness and zest, while raspberries bring natural sweetness with a hint of tartness. Together, they create a dessert that feels like sunshine on a plate. Whether you’re preparing this for a summer picnic, a family birthday, or just because you want something refreshing with your afternoon tea, this Raspberry Lemon Cake is a winner every single time.
What I love most is how versatile this cake is—you can bake it in a loaf pan for a tea-style cake, in a round pan for a pretty layered look, or even as cupcakes. Plus, it looks naturally beautiful because the raspberries add little ruby-like pockets of color inside every slice.
🛒 Ingredients
For the Cake:
-
1 ½ cups (190g) all-purpose flour
-
1 ½ tsp baking powder
-
¼ tsp baking soda
-
¼ tsp salt
-
½ cup (115g) unsalted butter, softened
-
¾ cup (150g) granulated sugar
-
2 large eggs, room temperature
-
1 tsp vanilla extract
-
2 tbsp lemon zest (from 2 medium lemons)
-
3 tbsp fresh lemon juice
-
½ cup (120ml) buttermilk (or milk + ½ tbsp lemon juice as a substitute)
-
1 cup (120g) fresh raspberries (can use frozen, but don’t thaw)
-
1 tbsp flour (to toss raspberries and prevent sinking)
For the Glaze:
-
1 cup (120g) powdered sugar
-
2–3 tbsp fresh lemon juice (adjust for desired consistency)
Optional Garnish:
-
Fresh raspberries
-
Lemon slices or zest curls
-
A sprinkle of powdered sugar
Step-by-Step Instructions
Step 1: Prepare Your Pan & Oven
-
Preheat oven to 350°F (175°C).
-
Grease and flour a loaf pan or an 8-inch round cake pan. Line with parchment paper for easy removal.
Step 2: Mix Dry Ingredients
In a medium bowl, whisk together:
-
flour, baking powder, baking soda, and salt.
This helps distribute the leavening evenly.
Step 3: Cream Butter & Sugar
In a large mixing bowl:
-
Beat butter and sugar with a hand mixer (or stand mixer) until light and fluffy (about 3 minutes).
This step adds air, which makes the cake soft and tender.
Step 4: Add Eggs & Flavorings
-
Add eggs, one at a time, beating well after each.
-
Mix in vanilla extract, lemon zest, and lemon juice.
At this stage, the batter might look slightly curdled—that’s okay! It will smooth out once you add the flour.
Step 5: Combine Wet & Dry Ingredients
-
Alternate adding dry ingredients and buttermilk to the butter mixture. Start and end with the dry mix.
-
Mix gently until just combined. Don’t overmix, or the cake will be dense.
Step 6: Fold in Raspberries
-
Toss raspberries with 1 tbsp flour (to prevent them from sinking).
-
Gently fold them into the batter using a spatula.
Step 7: Bake
-
Pour batter into the prepared pan and smooth the top.
-
Bake for 45–55 minutes (loaf pan) or 30–40 minutes (round pan).
-
The cake is done when a toothpick comes out with a few moist crumbs.
Step 8: Cool & Glaze
-
Let the cake cool in the pan for 10 minutes, then transfer to a wire rack.
-
Whisk powdered sugar and lemon juice until smooth. Drizzle over the cooled cake.
🌟 Tips for Success
-
Fresh vs Frozen Raspberries – Fresh is best, but if using frozen, add them straight from the freezer to prevent bleeding.
-
Prevent a Dense Cake – Don’t overmix once you add the flour. Gentle folding keeps it airy.
-
Boost the Lemon Flavor – Rub lemon zest into the sugar before creaming with butter. It releases essential oils for extra citrus punch.
-
Storage – Keeps 3 days at room temp (covered), or 5 days in the fridge. Can be frozen (without glaze) for up to 2 months.
🍴 Serving Ideas
-
Serve slices with a dollop of whipped cream.
-
Add a scoop of vanilla ice cream for a summer treat.
-
Garnish with extra raspberries and lemon zest curls for a show-stopping presentation